
A weekend project can lose its appeal before you even make the first cut.
You haul your tools outside, clear yesterday’s clutter from the patio table, and realize there’s nowhere to set your materials.
I’ve been there, and by the time you’re ready to work, a good chunk of the afternoon is gone.
In my experience, a well-planned outdoor workspace can prevent that.
It gives you a reliable surface and enough room to work with materials.
It also keeps your patio table free for the meals, candles, and flowers that make your outdoor space feel like an extension of home.
You don’t need a separate workshop to get started.
A narrow side yard, a wall in the garage, or a corner of the patio can do the job.
1. Turn an Unused Side Yard into a Project Zone
Before buying materials, walk the route from your tool storage to the spot you have in mind.
I like to carry something awkward, like a folding chair or a long garden stake.
When your hands are full, tight corners and awkward gates are much easier to spot.
Check the ground after it rains, too.
A spot that seems perfect on a dry afternoon might collect runoff or stay muddy near the house.
Look for a place where you can create a firm, level work surface without blocking drainage or access.
Tucking your work zone into the side yard also keeps sawdust and stray tools away from the patio where you relax and host.
Use chalk or string to mark where the bench will go.
Leave enough space to turn a board, open nearby doors, and get past someone who’s working.
I’d try the layout with a temporary table before building anything permanent.
A few test sessions can show whether the spot really fits the way you work.
2. Build a Workbench That Fits the Way You Work
A workbench for fixing garden furniture needs a different setup than one for assembling small planters.
Think about the materials you usually work with.
If boards keep sticking out into the walkway, it may be time to rethink your bench’s size or position.
This is the bench where a thrifted side table gets a fresh coat of paint or a new planter takes shape for your front porch, so it’s worth making it work for you.
A fold-down bench can work well in a shared space, as long as its supports and hardware can handle the load you have in mind.
A freestanding bench gives you more flexibility, but takes up room between projects.
I’d choose the option that fits how often you’ll use it and whether the space has other uses.
If the space doubles as a spot for morning coffee, a fold-down bench lets it look tidy and welcoming again in seconds.
Don’t overlook the edges.
Leave enough room to attach clamps without drawers or framing getting in the way.
For messy jobs, I find a replaceable top layer really handy.
Removable trays make it easy to clear away potting supplies before a repair, without reorganizing the whole bench.
3. Plan Shade around Both Projects and Yard Work
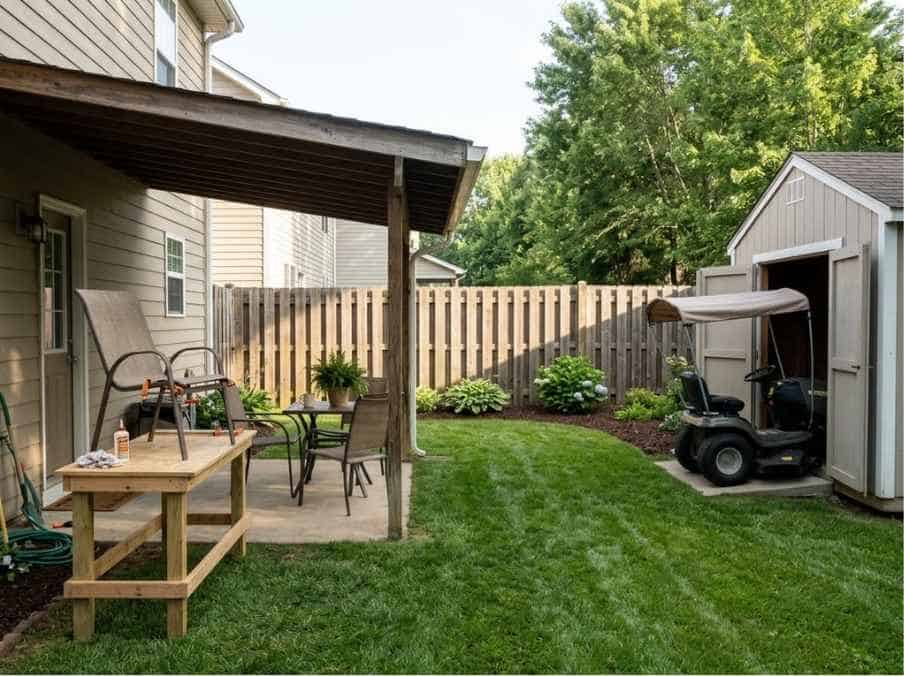
Visit the workspace at the times you expect to use it most.
Morning shade beside a fence may disappear by early afternoon, leaving your work surface exposed just when you finally have time to start.
Position the bench with those changes in mind.
An existing covered patio may give you a workable spot, while another yard might benefit from an adjustable shade setup.
Consider where supports will stand and whether they get in the way of carrying materials.
Keep the space around the bench usable.
Good shade also makes the space somewhere you’ll want to linger, and a shade sail or pergola can look just as lovely over a summer dinner as it does over a project.
Think beyond stationary projects, too.
Homeowners who divide their weekends between building and mowing may consider a lawn mower canopy when planning shade for routine outdoor tasks.
I’d check that it fits your mower and measure the clearance at your storage entrance before choosing one.
Planning around both activities helps keep your yard practical when projects and maintenance compete for the same afternoon.
4. Build a Potting Station with a Removable Soil Tray
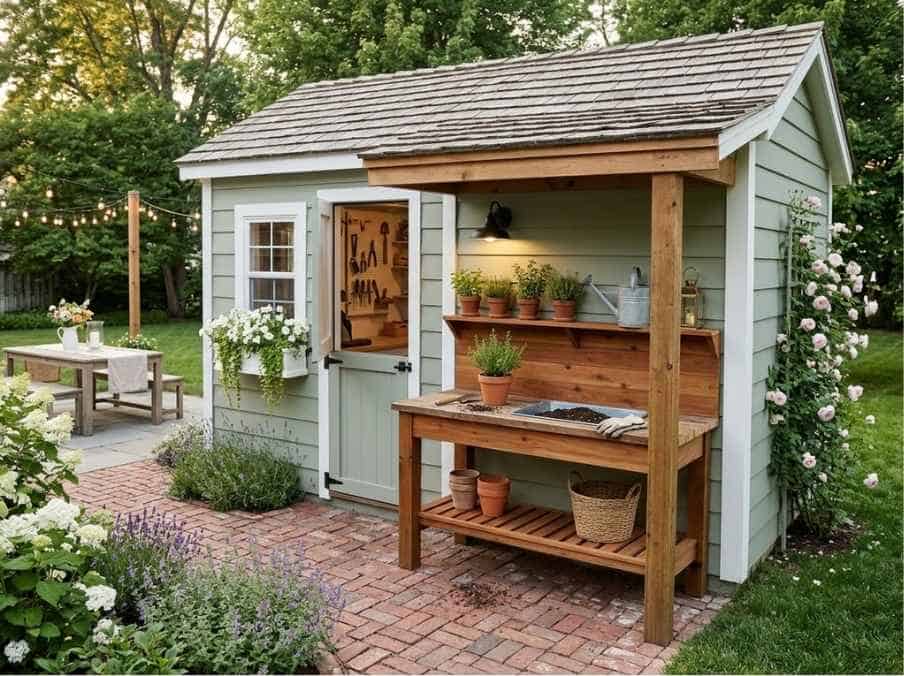
A potting station gives you somewhere to transplant seedlings, divide herbs, and refill containers without covering the patio table in soil.
I love how it becomes a little source of beauty for the whole house, with fresh herbs for the kitchen windowsill and blooms ready for a porch planter or a jar on the table.
Start with a sturdy secondhand wooden table or build a simple bench sized for your available space.
Leave enough room underneath for the pots and soil containers you already own.
Make the work surface easier to clean by adding a removable tray with raised edges.
You can mix potting soil inside it, then lift it away when you need the bench for another task.
A shelf above the table can hold empty seed trays, and hooks along one side keep your hand tools within reach.
Keep the design practical. Leave space beside the tray to set down a heavy pot.
If the station stays outside, I’d choose materials and finishes made for outdoor use.
A weathered wood finish and a few terracotta pots on the shelf can make it charming enough to leave on display.
5. Put Storage Where Each Task Happens
Storage is most useful when it’s close to the work.
Keep measuring tools near the surface where you mark materials, and garden supplies by the spot where you fill pots.
If you’re making repeated trips across the yard, something is probably stored in the wrong place.
That doesn’t mean every tool needs to stay outside.
A portable tote can bring your most-used equipment from indoor storage to the bench.
Give the tote a regular spot while you work, so tools don’t end up scattered across chairs, steps, and garden beds.
Keeping tools off the chairs and steps means your patio still looks ready for company, even in the middle of a project.
I like small, clearly labeled containers for hardware, with labels you can read without opening each lid.
Group parts in ways that make sense, such as by size or project.
Make room for cleanup tools, too.
With a brush and collection bin close at hand, it’s easier to clear the surface before debris becomes tomorrow’s first job.
6. Make a Rolling Project Cart for a Shared Patio
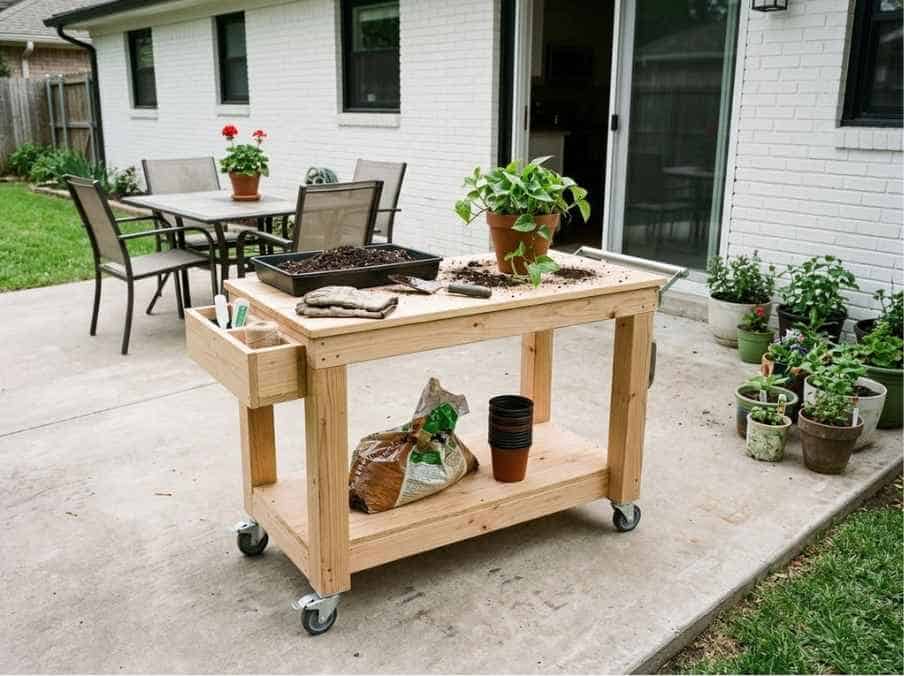
A rolling cart works well when your patio needs to switch between weekend projects and everyday use.
Build it around two surfaces: a sturdy top for small repairs and a lower shelf for supplies.
Size it so it can pass through the gate or doorway where you’ll store it.
Fit casters rated for the cart’s loaded weight, including locking casters to keep it in place while you work.
Add a shallow removable box for loose hardware and a handle at one end.
Before settling on the dimensions, I’d check that you can comfortably reach the lower shelf without unloading the top.
Use the cart for repotting plants, sorting hardware or assembling small pieces.
On days without a project, it can even double as a spot for drinks and snacks when friends come over.
For work that involves force, such as planing or heavy clamping, use a stable fixed bench instead.
When the afternoon’s work is finished, the cart can roll back into storage with your project supplies still together.
That quick reset is what lets your patio go from workspace to relaxing evening spot without a big cleanup.
Start with the Task You Keep Putting Off
Start with one recurring job and organize the space around it.
Fixing a loose outdoor chair, for example, may need only a sturdy work surface, clamps within reach, and a container for the hardware.
Try the setup, notice what slows you down, and adjust those parts.
I’ve found it helps to let each finished project point you toward what to add next.
And every repaired chair or freshly planted pot is one more small thing that makes your home feel cared for.

Leave a comment