
A blank wall can make a finished room feel incomplete, yet oversized art and professional framing can swallow your decorating budget.
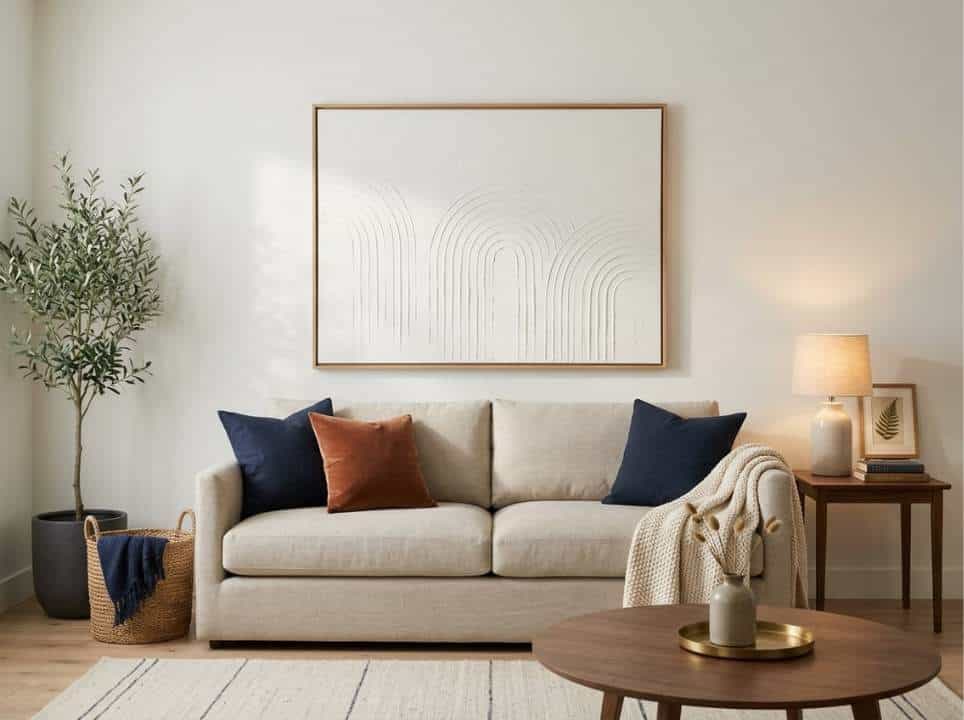
You don’t need art training, and I think a piece you made yourself gives a room a story no store-bought print can.
If you’d rather match colors to a numbered canvas, start with famous paintings paint by numbers, or pick one of the seven projects I’ve gathered here for scale and texture.
| Project | Advantages | Limitations | Cost pattern | Skill level |
|---|---|---|---|---|
| Paint Me Like Famous Paintings Paint-by-Numbers Kits |
|
|
Kits start at $26.99 | Beginner to intermediate |
| Textured Canvas Art |
|
|
Canvas plus compound | Beginner |
| Bird-Themed Artwork |
|
Fine details require patience | Paper or canvas plus paint | Beginner to intermediate |
| Vintage Gallery Wall |
|
|
Per frame and print | Beginner |
| Framed Textile Art |
|
Bulky fabric needs depth | Scraps plus frames | Beginner |
| Pressed Botanical Art |
|
|
Frames and backing | Beginner |
| Geometric Wood Slat Wall Hanging |
|
|
Wood plus backing and finish | Intermediate |
How Famous Paintings Paint by Numbers Compare with Other DIY Wall Art
I’d begin with paint by numbers if you want guidance.
Then move on to compositions with fewer rules before trying woodworking and power tools.
A large piece in muted colors looks expensive once it’s in a clean frame.
Compare hands-on time against how much you can change, keeping material costs and required skills in mind.
Treat prices as a way to compare projects, not fixed totals, since size and local stock affect your costs.
If you’re renting, check lease restrictions and hanging hardware, too.
1. Paint Me Like Famous Paintings Paint-by-Numbers Kits
Van Gogh, Monet, Seurat and Hokusai offer recognizable subjects without a gallery budget.
Paint Me Like makes numbered canvases with matching paints and brushes from museum-source artwork.
Set your working budget first, then use famous paintings paint by numbers as the project reference while comparing subject, canvas size and detail.
When you’re choosing the best famous-painting kit, I’d favor bold shapes and distinct objects over tiny figures.
Van Gogh’s The Bedroom gives you strong wall and furniture shapes to paint.
Because of its crowded riverside scene, Seurat’s A Sunday on La Grande Jatte calls for more patience.
If you’re a beginner wanting an easy famous-painting replica, choose a painting with fewer figures and moderate color variation.
I always rinse brushes between colors so dried acrylic doesn’t drag through the next section.
Aim for opaque coverage and choose a coordinated frame for a more polished finish.
Repeat one of the colors from the painting in a cushion, and I love how that small echo makes the art feel like it’s always lived in your room.
Hang the canvas with its center near eye level and leave space around its edges.
For small work, a wide mat gives it more presence.
| Snapshot | Details |
|---|---|
| Brand and product | Paint Me Like famous-painting kits |
| Kit format | Numbered canvas with matching paints and brushes |
| Examples | The Bedroom and A Sunday on La Grande Jatte |
| Cost check | Confirm size and framing, as prices may change |
| Best fit | Guided painting |
| Watch for | Tiny regions and separate framing |
2. Textured Canvas Art
Your blank canvas gets a thin coat of premixed joint compound, spread with a putty knife.
Paint the whole surface warm white once you’ve shaped the shallow arches or broad ridges, and you’ll see how the texture catches soft lamplight in the evening.
Keep each layer thin.
Thick compound can crack or make canvas sag, which is why deeper texture needs a rigid wood panel.
Let each coat dry fully before lightly sanding sharp peaks, and follow the label’s precautions for dust.
The Home Depot lists about 450 square feet of coverage for its 4.5-gallon Sheetrock premixed compound.
I’d buy a small tub or use clean leftovers instead of buying that contractor-sized quantity.
| Project snapshot | Details |
|---|---|
| Main materials | Canvas or panel plus compound and paint |
| Best visual style | Minimalist or sculptural |
| Active skill | Thin, controlled layers |
| Budget strategy | Small tub or suitable leftovers |
| Main caution | Weight and cracks |
3. Bird-Themed Artwork
A cardinal gives a cottage room a concentrated red accent, while a hummingbird suits green or teal surroundings.
Trace a copyright-safe reference onto watercolor paper, or simplify your bird into a silhouette.
Before choosing a design, compare palette and background complexity in the bird paint by numbers collection at https://www.paintmelike.co/collections/birds if you prefer guidance.
I’d keep the background quiet.
Paint the body first, then add the eye and beak with a few directional feather marks.
Don’t paint individual feathers.
Finish with a simple branch and a generous white mat, and you’ll have a little piece of the backyard to enjoy from your breakfast nook.
| Project snapshot | Details |
|---|---|
| Format options | Watercolor or guided painting |
| Alternative method | Traced silhouette |
| Best fit | Cottage or farmhouse rooms |
| Beginner strategy | Single bird and plain background |
| Polishing detail | Wide mat |
4. Vintage Gallery Wall with Thrifted Frames
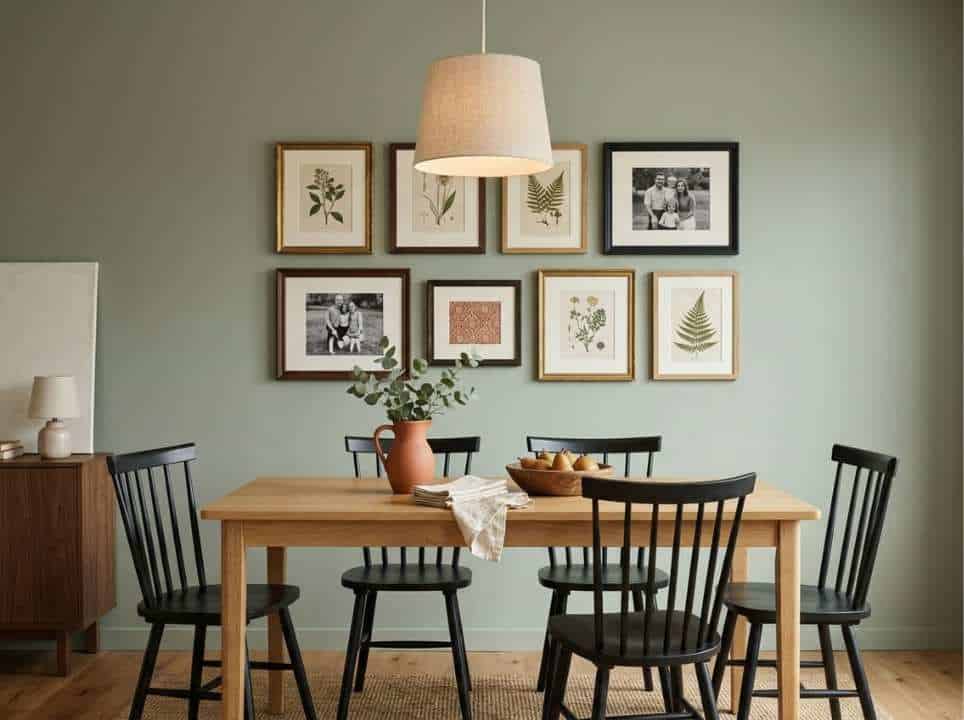
Collect thrifted frames gradually, then unify mismatched finishes with cream mats.
Mix public-domain botanical prints with your family photographs so the wall tells your story and greets guests like a warm hello.
Before taping kraft-paper templates to the wall, I always lay everything out on the floor.
Michaels announced nationwide 10-minute custom framing for $29 with a print and frame plus a gift box.
Compare that benchmark with thrifted-frame repair costs, since local availability varies.
One commenter on a wall-art display in r/Frugal wanted “more to fill up the wall,” although, as another noted, “you’re an artist and that time is valuable.”
Budget for the hours you’ll spend restoring it before you buy another frame.
| Project snapshot | Details |
|---|---|
| Main sources | Thrift stores and flea markets |
| Unifying element | Cream mats |
| Layout method | Floor layout, then paper templates |
| Budget checkpoint | Price plus repairs |
| Renter consideration | Compact layout with fewer holes |
5. Framed Textile Art
Frame a bold fabric remnant or an intact section of a vintage scarf.
Smaller patterns can become a coordinated group, and I think a scarf that once belonged to someone you love makes the most meaningful version.
Get your fabric ready first.
Wrap an inexpensive remnant around acid-free backing once it’s properly cleaned and pressed, securing it at the back without pulling the motif out of shape.
Permanent glue doesn’t belong on valuable fabric.
Use a deep mat for raised embroidery, and tuck every raw edge behind the backing board.
| Project snapshot | Details |
|---|---|
| Suitable materials | Remnants or scarves |
| Mounting method | Acid-free backing with rear attachment |
| Best frame | Standard or shadow box |
| Main caution | No permanent adhesive on valuable fabric |
6. Pressed Botanical Art
Press a flat leaf or small flower from a favorite walk between absorbent paper inside a heavy book.
Leave it in the book to dry completely, because trapped moisture can cause mold or discoloration.
Keep the paper uncluttered: one oversized frond on a neutral background needs little else.
Only collect plants you’ve identified as safe, and only once you’ve got permission.
Protected species and public-garden displays should stay untouched.
Colors can fade.
Plants won’t last forever on an interior wall or behind UV-protective glass, even when they break down more slowly.
I find a narrow oak-toned frame leaves the leaf’s structure in view and brings a bit of that season into your home.
| Project snapshot | Details |
|---|---|
| Best specimens | Flat leaves or delicate ferns |
| Preparation | Press until fully dry |
| Display style | One oversized frond |
| Placement | Away from direct sun |
| Main caution | Moisture and fading |
7. Geometric Wood Slat Wall Hanging
Attach narrow wood lattice to thin plywood in offset lines or repeating angles.
Before using wood glue and brads, dry-fit every strip.
Keep brads short enough that they won’t pierce the backing.
Before applying leftover wall paint or stain in a single color, sand the cut ends and clear away the dust.
Thanks to that single color, narrow gaps between strips cast clear shadows as daylight moves across your room, giving your wall a slow, changing rhythm I never get tired of.
Use hanging hardware rated for the completed weight and anchors suited to your wall.
Check the top edge with a level before tightening the hardware.
| Project snapshot | Details |
|---|---|
| Main materials | Lattice, plywood, glue and brads |
| Tools | Saw, measuring tools, sandpaper and level |
| Best finish | One stain or paint color |
| Skill level | Intermediate |
| Safety priority | Weight-rated hangers and suitable anchors |
Make Your DIY Wall Art Look Collected, Not Homemade
What counts isn’t spending more, but getting the size right without clutter.
I’ve found a carefully sized piece with a clean border can feel more considered than a crowded wall of unfinished experiments.
Choose the project that fits your tools and available evenings, then decide how much space it needs above your sofa.
Your piece needs space around it to breathe, the same way a cozy room needs a little openness.
Measure your wall before buying anything.
Buy only the supplies your project needs after you’ve picked a frame or canvas width that fits the space.

Leave a comment