
The pegboard, workbench, and wall storage tend to get most of the attention when you picture a backyard workshop.
They’re the visible pieces, the things that make your space feel finished and personal.
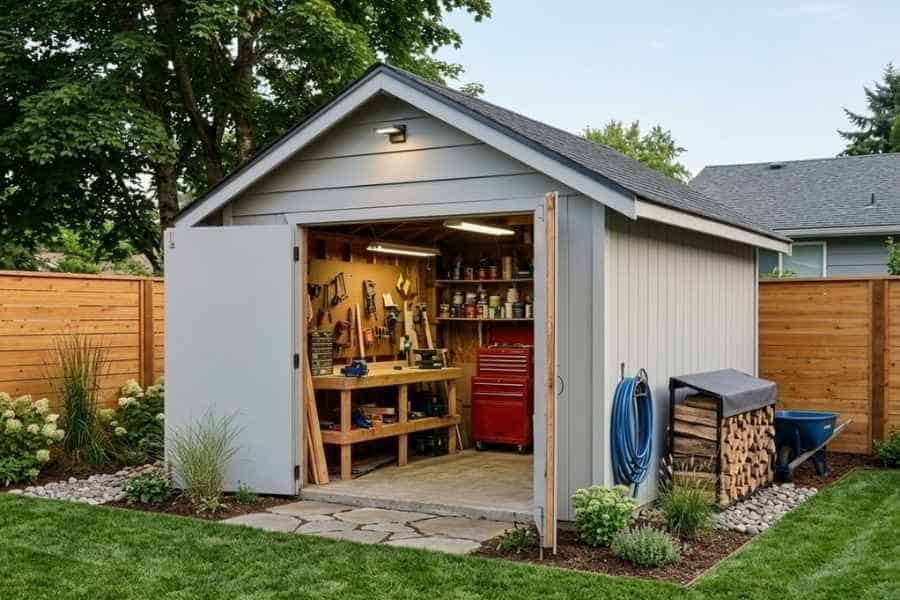
But long before any of them go up, your workshop is already being shaped by decisions that are much harder to undo.
Ceiling height, roof framing, door placement, natural light, and open floor space all influence how the room feels once you’re using it.
I’ve seen beautifully organized workshops that still feel cramped because those basics were off.
Get them right, and the rest of your space becomes much easier to build around.
It’s the same principle you’d apply inside your home, where no amount of styling rescues a room whose proportions fight you.
Start with How You’ll Actually Use the Space
A workshop for weekend repairs has different demands from one filled with woodworking equipment, lawn machinery, or stacks of project materials.
Instead of starting with an empty floor plan, I’d think about the biggest, messiest jobs you expect to tackle there.
Square footage only tells part of the story.
If you regularly handle plywood or long boards, a clear path across the room may matter more than extra wall space.
Taller walls can add storage without squeezing your work area, while heavy tools require enough floor strength and clearance to use them safely.
Picture an ordinary day in your shop.
Where will materials come in?
Where will finished projects sit?
Which tools need room on every side?
Those questions usually reveal more than a neat floor plan ever will.
This is the same quiet math you run when you arrange a living room around how your family actually moves through it rather than how it photographs.
A shop that respects your habits ends up feeling welcoming in the same way a well-planned kitchen does.
Roof Shape Changes More Than the View from Outside
The roof does more than define your workshop’s exterior.
Its pitch, height, and framing affect how much usable space you have above benches, tools, and storage.
A steeper roof may create valuable vertical room, while a lower profile can work well for a simpler, more compact structure.
The choice between lean-to and gable shed designs also influences where full-height walls, windows, and overhead storage can fit comfortably.
Your roofline is also the part of the build your neighbors and guests see first.
Choosing a pitch that echoes your house keeps the backyard reading as one considered whole instead of a home with an outbuilding parked behind it.
These choices are easiest to sort out while the building is still on paper.
Once your roofline is set, adding meaningful headroom can mean changing far more than a few interior details.
Don’t Let the Roof Framing Steal Your Best Space
Roof framing can have a surprisingly big effect on how open your workshop feels.
Deep members, low bottom chords, or awkward support locations can eat into the very space you planned to use for lighting, lumber storage, or taller equipment.
For a post-frame workshop, metal trusses for pole barns can be an option when the design calls for more usable headroom beneath the roof.
The right setup still depends on span, roof pitch, structural loads, and intended use.
That turns roof framing into more than a structural decision.
A few extra inches of clearance may look insignificant on a drawing, but they can feel very different once shelves, fixtures, and equipment start filling your room.
Open overhead space carries the same weight here that a high ceiling does in a home.
You feel it before you can explain it, and it’s the difference between a room you retreat to and one you tolerate.
Plan Doors around the Biggest Thing You’ll Ever Move
A standard entry door might be enough for a small hobby space.
Workshops, however, have a habit of accumulating larger tools, bulkier materials, and equipment you never expected to own.
Plan your opening around the biggest thing you may need to move through it, not what fits today.
Double doors or a wider overhead opening can make moving sheet goods, machinery, lawn equipment, or finished projects much easier.
Placement matters as much as width.
A generous doorway loses much of its usefulness if a bench, shelf, or support post creates a bottleneck a few feet inside.
Doors also set the tone the moment anyone steps through them.
A wide opening that swings toward the garden turns your shop into a place you invite people into rather than a closed door at the end of the yard.
Think about Light before You Think about Fixtures
Good workshop lighting begins before your fixtures go in.
Window placement, wall orientation, and ceiling height all affect where daylight reaches and where shadows settle.
Windows near your main workbench can reduce the need for artificial light, but they also use wall space that could hold cabinets or tools.
High windows can bring in daylight while leaving more of your wall usable.
Once you understand how natural light behaves in your room, overhead and task lighting can be placed where it actually helps instead of being added later to fix dark corners.
Daylight is the one design element you can’t buy afterward, which is why I’d treat window placement with the same care you’d give a room you plan to spend mornings in.
A shop with good light stops feeling like a utility building and starts feeling like a room in your home.
Build for Weight, Weather, and Reality
A workshop has to deal with more than its own weight.
Roof structure, wall framing, and connections can all be affected by local conditions, particularly in areas with heavy snow or strong winds.
Your structural planning should account for wind, snow, and other design loads before dimensions and framing details are finalized.
Building requirements vary by location, so an approach that works for a small shed in one region may not be suitable for a larger workshop somewhere else.
This is one of the areas where getting things right early matters most.
Walls, roof framing, and structural connections are far more difficult to change once your building is standing.
There’s also a quieter payoff here.
A structure that shrugs off a hard winter is one you stop worrying about, and that ease is part of what makes a property feel settled and cared for.
Leave Yourself Room to Change Your Mind
Very few workshops stay exactly as they were on day one.
New tools show up.
Storage needs grow.
A casual hobby can become a much more serious operation over time.
Building in a little flexibility now can save you a lot of trouble later.
Extra outlets, accessible wiring routes, open wall sections, and unused overhead space all make future upgrades easier.
I’d also place permanent features carefully so they don’t block the possibility of adding cabinets, insulation, larger equipment, or even a small loft.
Homes that age well work the same way, holding room for new needs without demanding a full remodel each time your life shifts.
You don’t need to predict every project you’ll take on years from now.
You simply need enough breathing room for your space to change with you.
Build the Bones, Then Make It Yours
The pegboard, cabinets, paint, and tool storage are where your workshop starts to feel personal.
They’re also the easiest parts to change.
The structure underneath them is a different story.
Good proportions, clear access, useful headroom, solid framing, and room to adapt give your workshop a longer practical life.
Once those fundamentals are in place, your finishing touches can make the space easier and more enjoyable to use.
And that’s when the shop starts doing what a good room in your home does.
It draws you out there on a Saturday morning for no particular reason at all.

Leave a comment